Clutter makes you feel like your life is out of control. And toys seem to create clutter more than anything else in a home with kids.
If you’re like me, you’ve been desperate enough to start fantasizing about throwing most of your kid’s toys in the trash.
The urge to purge isn’t necessarily a bad one. But there might be — ahem — a “more thoughtful” approach to your toy deluge.
I wanted a better system for my small kids’ toys, and the one I eventually came up with has saved me a lot of sanity since. Taking even one of these steps might make a big difference in the toy clutter problem in your home.
1. Identify (and limit!) toy storage locations.
I was inspired by the Konmari Method (affiliate link) to make sure I had a designated “home” for each of my son’s types of toys.
After a quick assessment, I realized that I had toys stored in almost EVERY room in my house. And the toys didn’t so much have specific homes as they were thrown into the nearest bin.
I thought all those bins were making it easier for me to clean up the stray toys that ended up all over the house. In reality, they were a CAUSE of the toys being all over the house.
So, start by clarifying which spaces you want to store toys in, and try to choose as few storage spots as you can get away with.
Whether or not you choose storage locations that kids can access themselves or that require them to ask for help is up to you — but, as we’ll discuss later, it’s best to keep a majority of the toy storage inaccessible if you want to minimize clutter. (Too many accessible toys can overwhelm kids, anyway.)
Remember, these locations are just for storage, not for actually playing — but storing the toys near where you want/expect them to be played with is a good idea. You might want to take a moment to consider ideal toddler play spaces in your home.)
As you decide on toy storage locations, keep in mind that they’ll need to accommodate the following toy types.
Rotated-Out Toys / Adult-Supervision-Only Toys – This location should be off-limits to kids, preferably somewhere they can’t see and don’t know about, for toys that could do damage (think craft supplies), toys that are being rotated out (we’ll discuss this later), or toys that you want to limit access to for other reasons.
Ugly/Annoying Toys– Almost all of us end up with gifted toys that we don’t love or that ended up having surprisingly annoying audio components. Preserve your sanity by designating some toy storage in a place where you’ll be spared their sights and sounds as much as possible.
Potentially Damaging Toys – If you want to give your kids access to things like play sports sets, sit-and-spins, and bouncy balls, you might want to delegate a storage in an area where kids won’t break anything expensive when they pull the toys out to play.
The Many-Small-Pieces Toys – Toys like blocks, train sets, puzzles, and miniature sets are best stored in a location that can keep them relatively contained when they’re played with (or simply dumped out), such in as a room with a door or in/under a train table that can contain the parts.
Note that it’s fine for toy storage locations to have multiple roles. For example, maybe the bedroom or the playroom or the basement is the only place that can accommodate all these toy types. That’s fine! Do what works for you.
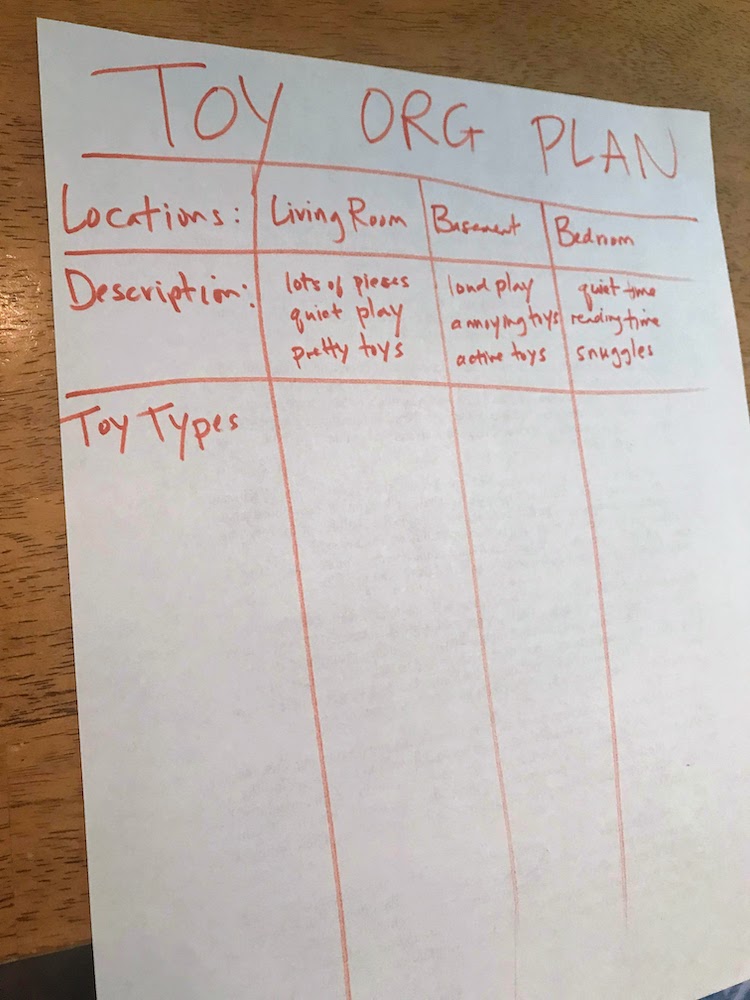
Personally, I got rid of most of the toy bins in my house and limited myself to the following toy storage locations.
The living room – I designated a large bookshelf to store most of the toys the kids play with regularly. The shelf is inaccessible to the kids but mostly visible to them. (The train table in the living room can contain the spaces from the many-piece toys when I get them down.)
The basement – The basement is mostly unfinished and isolated from the rest of the house, which makes it ideal for louder and more active play and uglier toys.
My bedroom shelf – If there are certain toys that I’m ready to move on to St. Vincent de Paul or that I’m pretty sure my kids are finished with, I put them in a designated area labeled with the date and wait and see if anyone asks for them.
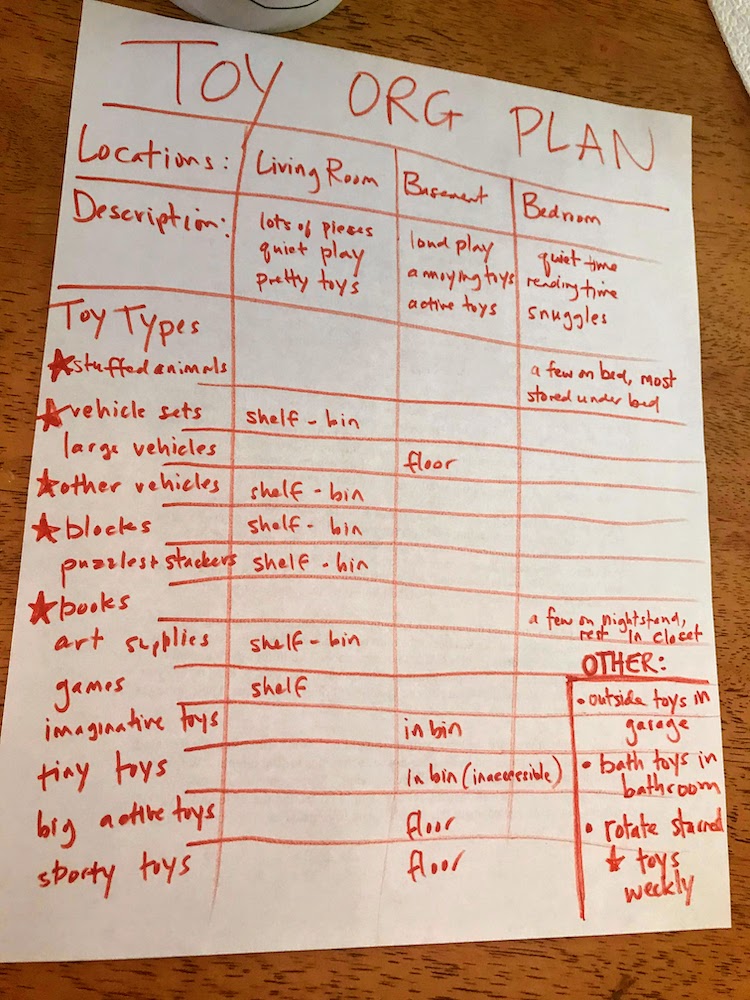
I’ve clarified my process a little by making a little grid on an 8.5 x 11 inch piece of paper. Here’s the first step:
2. Physically compile your toys into groups (and make a list).
The next step is to take inventory of which toys you actually have. The best way to do that, if you can, is to physically get them all out and put them together in groups. Then, list those groups.
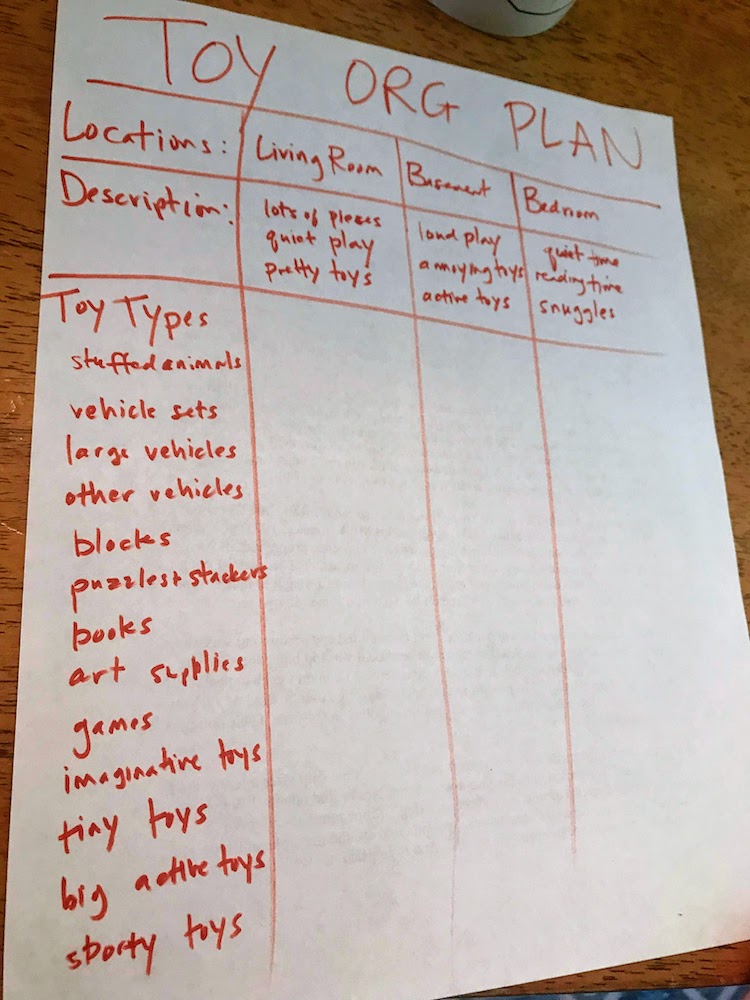
Here’s what I eventually came up with for my comprehensive list of toy groups:
Stuffed animals – Despite my only ever having purchased two of these, my son has about 40 (which I only realized after I put them all in one place).
Vehicle sets – My son has a few dozen Hotwheels cars with tracks, a wooden train set, a VTech Go Go Wheels set, and a “Magic Tracks” car set.
Large vehicles – We have acquired a huge school bus, fire truck, and plenty of large construction trucks and diggers.
Other vehicles – This includes vehicles that don’t belong to a set and aren’t particularly large.
Blocks – Including wooden blocks, magnet blocks, Duplos, Mega Blocks, and Wedge-Its.
Puzzles and Stacking Toys – We have several of each.
Books – These aren’t toys, but I realized they still need a designated home because they were scattered all over the house.
Art Supplies – Also not toys, but deserve a dedicated storage space.
Games – We just have a few board games for our toddler.
Imaginative toys – These include things like a doctor kit, a superhero cape, a police officer hats, binoculars, play food and play kitchen stuff.
Tiny toys – These include things like happy meal toys, small balls and spinning tops.
Big, active toys – My son has a tent, tunnel, inflatable ball pit, big exercise ball, a huge floor foam puzzle, a basketball hoop and a ride-on airplane.
Sporty toys – These include the ubiquitous plastic bouncy balls from the grocery store, a mini golf set, a Bilibo, and a soft baseball bat, among other things.
You can list the toy types along the left side of the paper, like this:
Toy organization strategy step 2
3. – Eliminate if necessary
Seeing all your child’s toys alongside the other toys that are extremely similar might leave your jaw on the floor. This could be a good time to start paring down.
I always struggle with this. It’s way easier to get rid of my own things than it is to get rid of my kids’ — it doesn’t feel like my decision to make, technically. And toddlers aren’t old enough to grasp the charitable concept of giving toys away.
My solution is to put certain toys that I don’t love “on probation” up in the storage area marked with the date. If my son doesn’t ask for it for several months, I can usually move it along guilt-free.
Don’t waste too much energy trying to figure out whether to keep certain toys. As David Allen says in the book “Getting Things Done” (affiliate link), you can adopt the “when in doubt, throw it out” mantra or the “when in doubt, keep it” mantra. Either one works — the key is to move through quickly so you don’t get frustrated and abandon your organizing.
4. Match the toy types to their new “homes.”
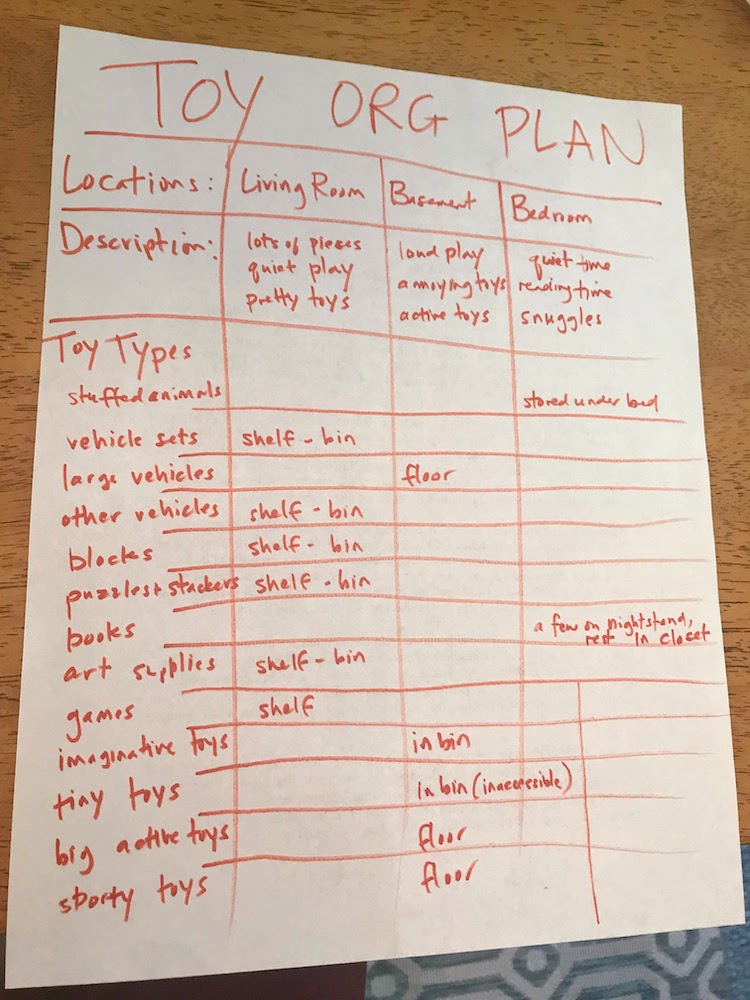
Once your toys are grouped and possibly slimmed down, decide which storage location (from step 1) that each toy group belongs in. Looking at the list again, you’ll probably add a few more locations and might want to specify specific locations within the general location. Here’s what I came up with.
Bedroom
Stuffed animals – In an under-the-bed storage bin
Books – On the bedroom closet shelf
Living Room (all of these are stored on the shelf)
Vehicle sets
Other vehicles
Blocks
Puzzles and Stacking Toys
Games
Art supplies
Basement
Imaginative toys – in a bin on the only shelf in the basement
Tiny toys – in a tupperware container out of reach on the same shelf
Large vehicles – on the floor
Big toys – on the floor
Active toys – on the floor
Garage
Outdoor toys (bikes, soccer balls, etc.)
Large toy trucks that get played with in the mud – large tupperware bin
Bathroom
Bath toys – in a water-friendly bin stored under the sink
5. Make a few “toy rules.”
Once you have your toys inventoried and stored, it’s time to make a few rules about getting the toys back out. Here are the ones I came up with.
Only 5 Stuffed Animals Out at Once. The rest are stored out of sight and are switched out occasionally.
Only 1 “Small Parts” Activity Available at a Time, Preferably on the Train Table – Building sets, vehicle sets, puzzles, and miniatures are fun and have a lot of educational value, but they are also the most annoying to clean up and keep together. He only needs to have one or maybe two out at a time.
10 Vehicle Max – My son loves each of his many random cars, trucks, airplanes and other vehicles. Instead of getting rid of them, I let him keep 10 out at a time in a bin on the bookshelf. The rest go up in the closet until I need to keep him entertained.
You can see the rules in the bottom right-hand corner of the sheet
I also came up with a few other rules about toys in the house:
No toys in the kitchen or dining room
No toys in the TV / family room (it’s the room in the house that everyone sees first when they walk in through the front door, and it’s calming to have it be toy-free and easy to clean. Most days, this is the only clutter-free room in the house)
No toys in the bedrooms (I loved playing in my room with my toys as a kid and many families manage it well, but for us, it was stressful to keep my son away from toys at bedtime and I wanted him to associate the room with sleeping, not playing).
Of course, these rules essentially boil down to the fact that toys should be played with in the rooms they’re stored in. I’m not very strict with these rules, but I try to make sure everyone keeps them in mind.
Ongoing: Keep it Fresh
After I took these steps, I was thrilled with how many areas of my house stayed toy-free or got way easier to de-clutter.
I wasn’t finding puzzle pieces in far flung corners of the basement or stacking toy parts under my kid’s bed anymore.
The toys that I started rotating got more attention than they ever had, and I always knew where to find the toys he asked for.
Even when things got messy — like after his friends came over to play — it wasn’t as stressful because I knew exactly how to put the toys back.
And we all lived happily ever after.
Just kidding. I’ve had to keep refining my methods. Here’s what I learned:
Toy organization is not a one-time task. Kids grow, siblings are born, interests change. And most importantly, the tide of toys continues to wash in. Post-birthdays and post-holidays are good times to re-evaluate your toy situation. Save your toy organization notes so you can easily update them later.
Make sure other caregivers are on board with toy rules. It only takes a few times for grandparents, babysitters and even spouses to start putting things where they don’t belong for your system to unravel. Get them on board right away.
Keep it simple. If you find yourself or your family ignoring toy rules, your system might be too complicated. Concentrate on the toys or areas of the house that cause the most problems. Even just doing this is better than throwing up your hands and resigning yourself to live in Clutterville.
Toy storage choices matter. I only figured this out when my kids were older (and have updated this post to reflect it); the bigger the storage container, the less helpful it is. Smaller bins make smaller messes when they’re overturned — and they might not need to be dumped anyway because kids can find what they need more easily. I even wrote a full anti-toybox post here. If you need a bigger storage solution for sets like wooden train sets or a big Duplo collection, try a drawstring storage bag that doesn’t need to be dumped out.


")

